The Push Notification system has a great deal of options for customization that helps you target Parents and School Groups the right way. The 4-step push send process is quick & simple, and you can do it right through your dashboard. To get started, just log into an app and click the Push Notifications header.

Things to Keep in Mind
- Your app must be live in order to send push notifications. There’s no way for users to receive them without having the live app installed on their device.
- When an app is installed, users can choose to enable or opt out of push notifications. If they opt out, they won’t receive any from your app.
- If you want to receive push notifications successfully, it’s important to enable both push notifications AND location services, which allows you to receive location-based messages.
- The Messages tab will serve as a log of push notifications received. Add it to your app so users can reference them later!
- If you encounter any errors when sending a push notification, see our troubleshooting article.
Step 1: Message
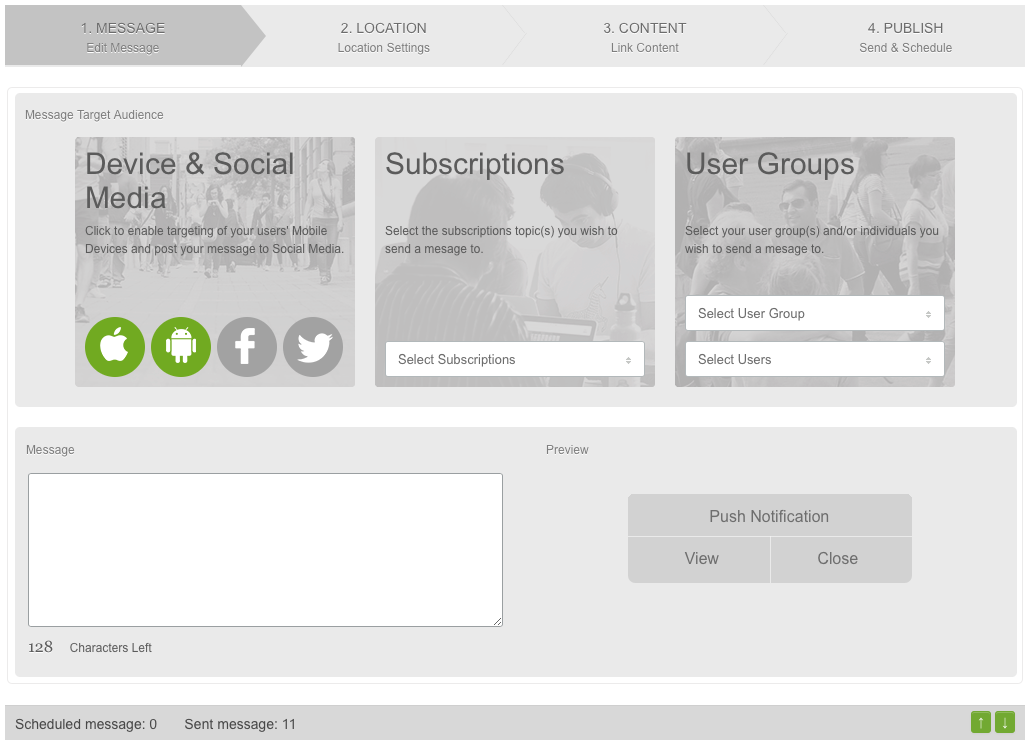
- Select the devices (iOS and/or Android) you’d like to send the push notification to.
- If you’d like to publish your message to social media sites (Facebook and/or Twitter), you can connect your account here. Once you’ve logged in, just check the box next to the site.
- Enter the text of the message. There’s a 128-character limit in place, because additional text wouldn’t appear in full on the device screen.
- The simulator on the right will give you an idea of how the home-screen alert would appear on an iOS device.
Subscriptions and Users/Groups selected (This will effect applications on Orange or newer source code)
Subscriptions and User Groups logic
If you wish to send a message to all users to your mobile apps: Select iOS and Android, leave other fields blank.
To further segment your push notifications please read the following:
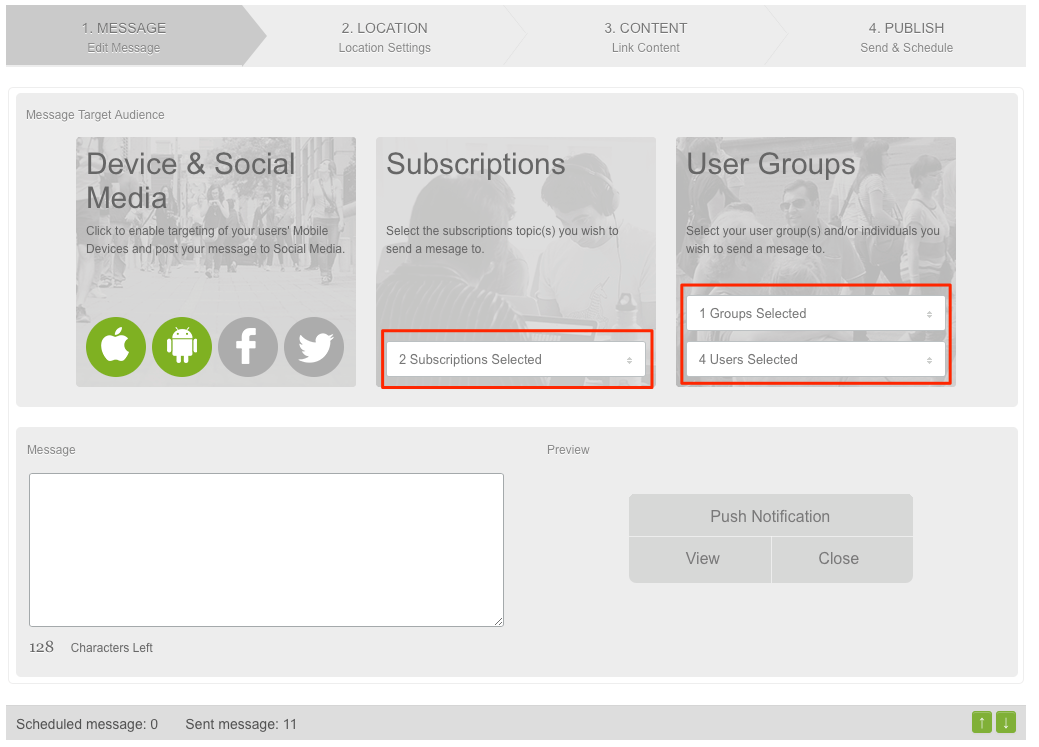
Subscriptions
When Subscriptions are enabled, you can send push notifications assigned to one or multiple subscriptions.
For users who have a selected subscriptions turned off on their device, they will not receive the push note alert, however they will still see the message in their messages tab.
If you choose not to select any subscriptions, the push notification will go out to ALL users, even if they have all subscriptions turned off (This of course does not override the device targets or user groups selections).
User Groups
When user groups are enabled you can send push notes to an exact number of members.
When selecting one or multiple groups from the group dropdown you will see the users in those groups are auto selected in the user selection.
Now you can either leave as is, or further modify which users will receive your message by adding/removing users.
When sending a push note using User Groups, those users that were not selected here will NOT receive the push note and it will NOT be displayed in the messages list.
Linked tabs that are sent to users who do not have access to these tabs will receive the message, but they will not be able to tap (open) the tab.
Note*
Subscriptions and User Groups can be used independently or in unison, along with all of the location features as well.
Step 2: Location
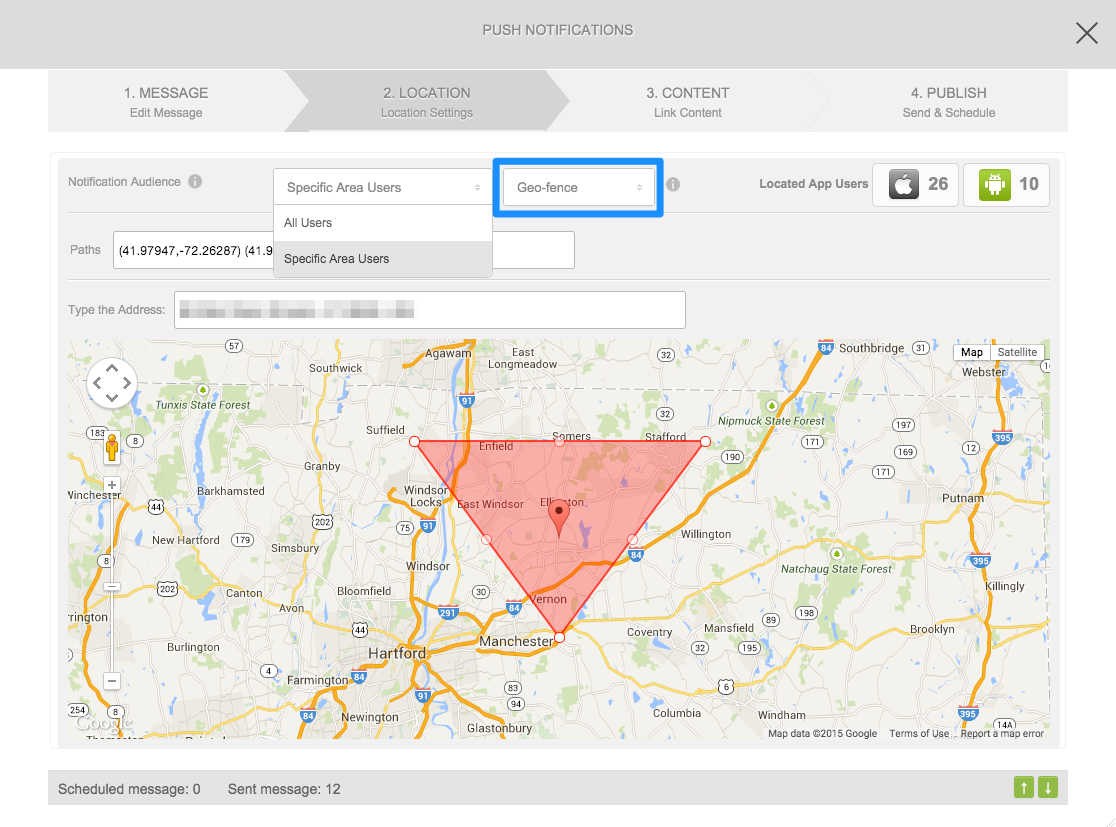
- Choose your Notification Audience here. Use the drop-down to change from All Users (the default) to Specific Area Users.
- Specific Area Users has two options: Radius and Geo-fence. When you select a specific location, you’ll see the Located App Users in that area reflected to the right. A Located App User is someone who enabled location services for the app when they installed it, and is currently within your radius or geo-fenced area.
- Radius allows you to set a circular send-zone around one location. You can input the latitude & longitude, or type in the address bar to look up a spot. Adjust the size of the zone with the Radius field, and use the unit drop-down to select kilometers or miles.
- Geo-fence allows you to set up a “fenced” area. When a user enters this area during the “active period” (Step 4), they’ll receive the push notification. You can jump to a region the same way you do with the Radius option, and also have the added option of dragging the borders of the fence to create a custom shape.

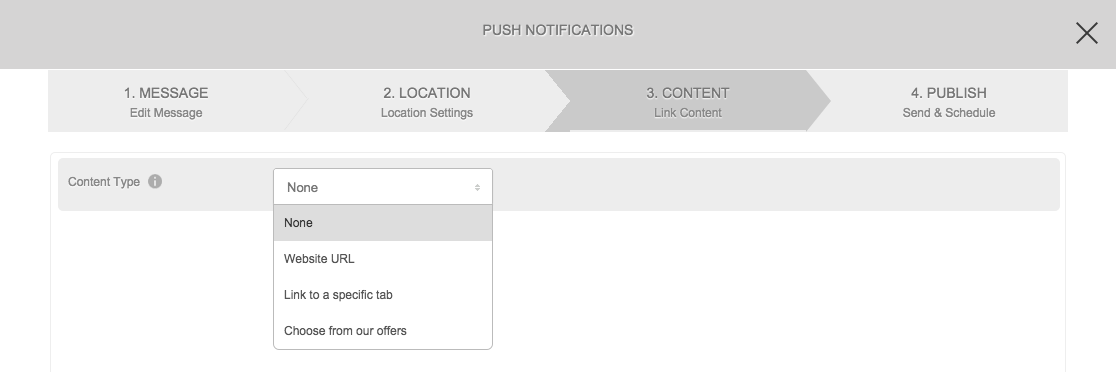
Step 3: Content
- Here you can add some customization your push notification with the Content Type drop-down.
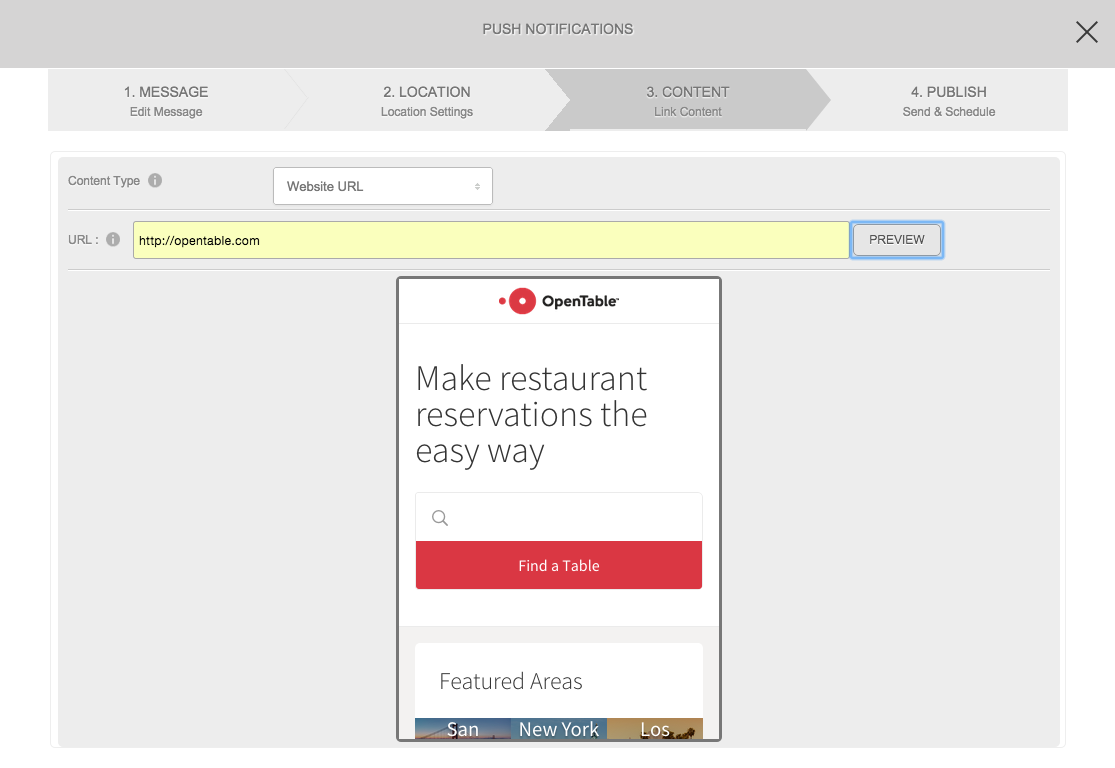
- Website URL lets you link your push notification to a site. When a user clicks the push notification, they’ll be directed to that URL. Great for school Guest Speakers and Parent Night Information
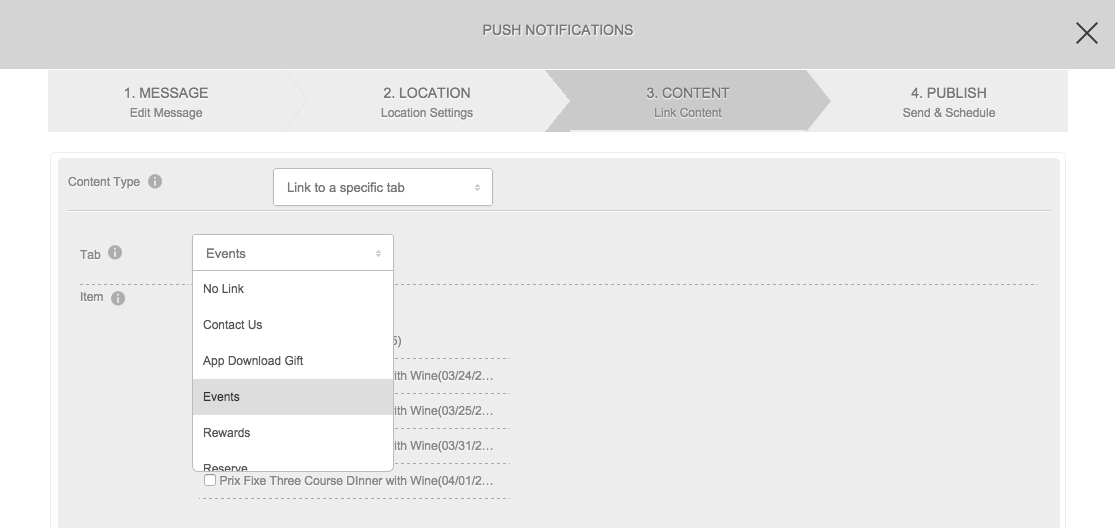
- Link to a Specific Tab allows you to do just that. You can choose a tab within your app from the drop-down, and even specific items within those tabs (like an event in the Events v2 tab), when applicable. When a user clicks the push notification, they’ll be taken to that specific location within your app.
Website URL: Great for GUEST Speakers and further parent information
Link to a Specific Tab: Always use this for Newsletters, so the Newsletter will automatically load for the parent
Choose from our Offers: Mainly used for Events, like a School Production
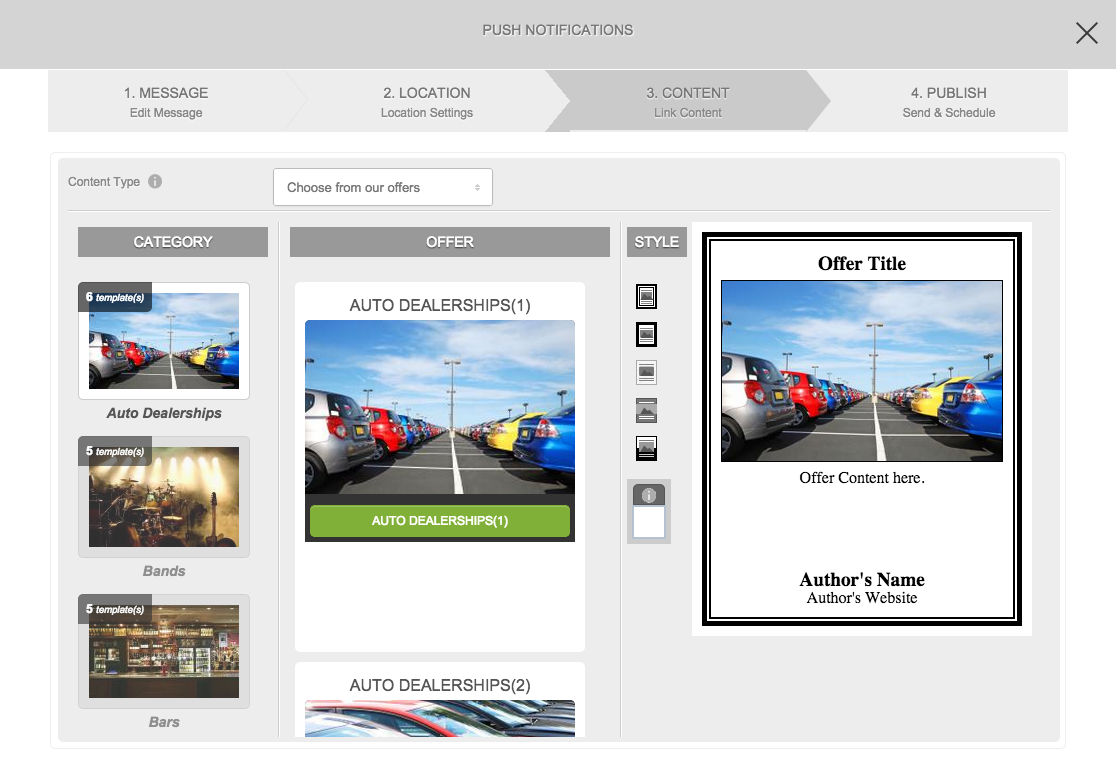
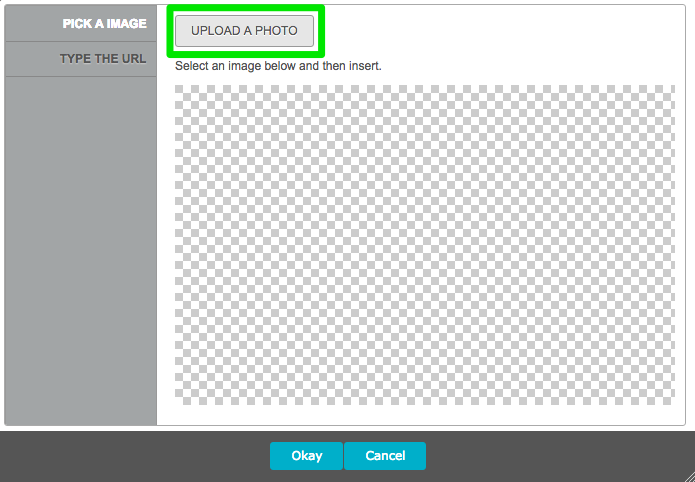
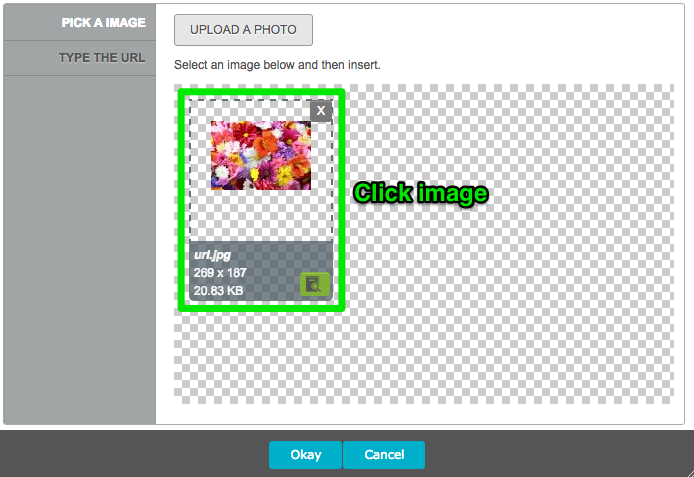
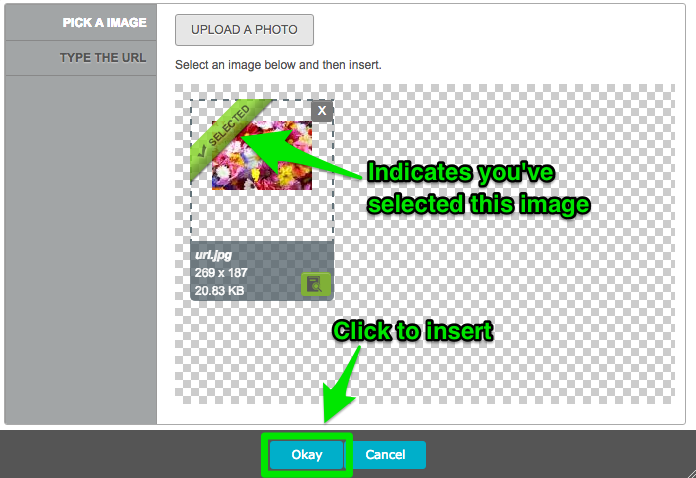
Changing the offer picture (recommend 5:7 height:width ratio for image; bottom will be cropped automatically):
Note: If you delete a previously used offer image from this window, the image will no longer be hosted on our servers. This will prevent it from loading when users click and view the old push notification from their Messages tab. For this reason, we don’t recommend deleting images that you have used in a prior push notification.
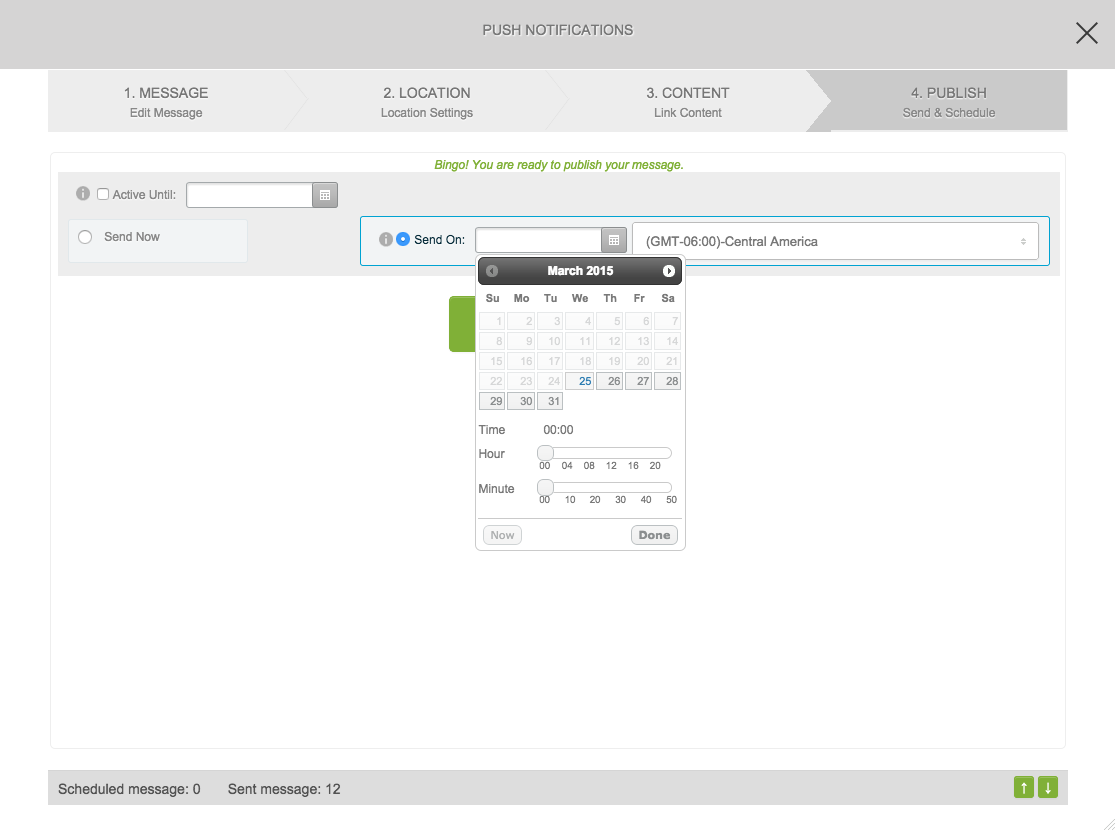
Step 4: Publish
- This is your final step, where you determine when your push notification will be sent out to users. Click Send Now to deliver your message immediately, or Send On to schedule it for later.
- Send On allows you to schedule your message based on the applicable time zone. Select the time zone from the drop-down menu, then click the calendar icon next to the date & time to schedule it. You can use this scheduling option for any push notification type (All Users, Radius, or Geo-fenced).
- Active Until only applies to geo-fenced push notifications. This is the end-time for the active period of the message. For instance, if I set mine to next Tuesday, any users who enter the geo-fenced area before next Tuesday will receive my push notification.
- Once you’re ready to go, just click the Publish Message button!