iSchoolApps Background Images & Home Screen Slider Images
The iSchoolApps platform allows for a great deal of customization, especially when it comes to background images. You can assign unique background images to nearly every tab and add sliding images to your home screen for a more dynamic user experience. We offer template background images that cater to various industries. You can select from these options or upload custom images that you create.
Note: The iPhone 4/4S section will not appear for newly created apps. The “Phone” section will apply to the iPhone 4/4S by default. See here for more details.
Selecting/Uploading Background Images
1. Navigate to the Appearance Step and click the Background Images header. There are three sections within Background Images:
• Phone: This section applies to iPhone 5 & up (5S, 5C, 6, 6 Plus) and Android phones.
• Tablet: This section applies to iPad and Android tablets.
• iPhone 4/4S: This section applies to iPhone 4 & 4S only.

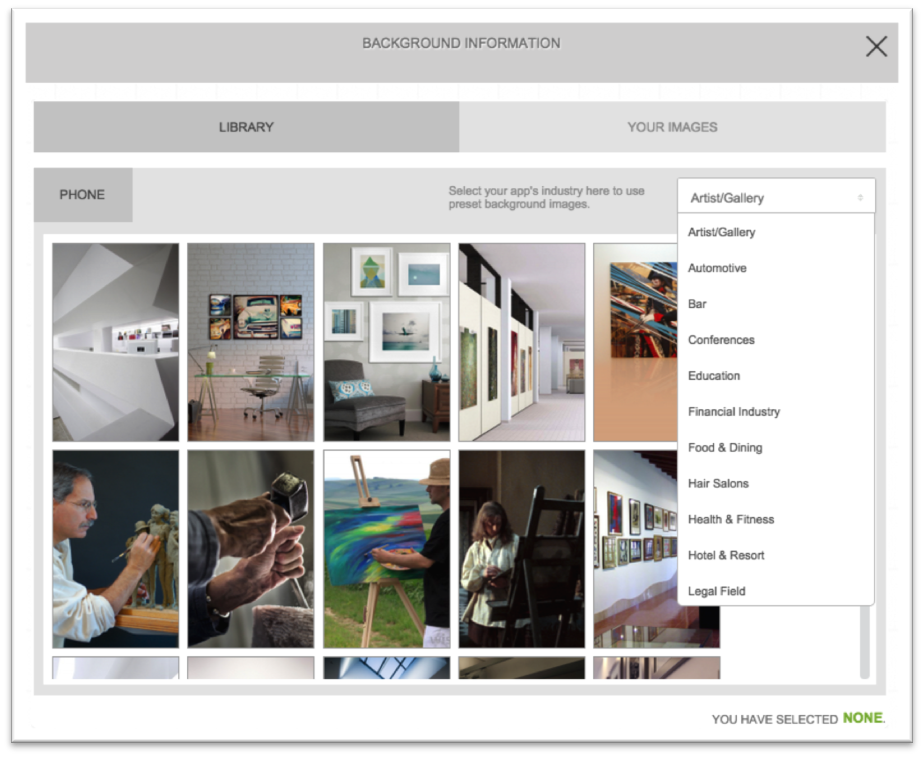
2. To upload or select a template background image for the size section you’re viewing, click Add/Remove Image(s) at the top right. If you plan to activate the apply your iPhone 4/4S images to the Phone & Tablet sections, you should start there. A pop-up window will appear with two tabs:
• Under the Library section, you can choose from template images we provide.
• Under the Your Images section, you can upload custom images to use in your app.
3. If you want to select template images, click the drop-down menu to browse through various industry options. (Note: You can use any image for any industry, we just categorize them for your convenience.)
3. Once you find an image you like, just click it. The Import Images button will appear at the bottom left when you’ve selected one or more images, and the image file names will be listed at the bottom right.
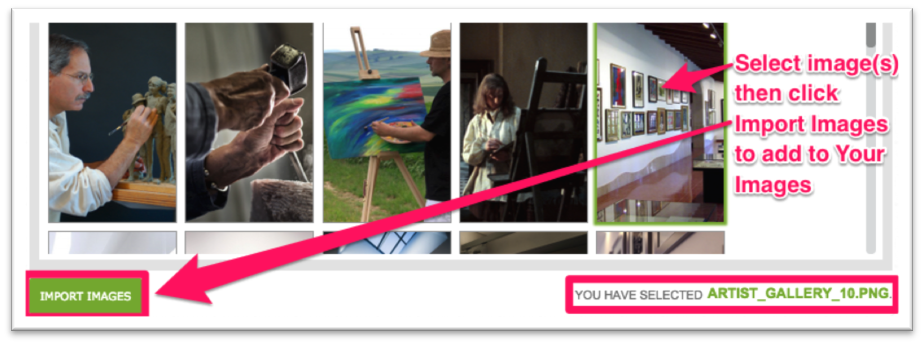
4. Click Import Images to add the selected images to the Your Images section. Back in Background Images, you’ll see the imported images appear. Skip down to the Assigning Images section below for the next steps.
5. If you want to upload custom images, go to the Your Images section. Here you’ll see all images you’ve selected from the Library or uploaded manually. Before uploading images, please review the second table in our size guidelines article, which lists the optimal dimensions for home screen and tab-specific background images for all three size sections. If you don’t follow these guidelines, your background images may appear stretched.
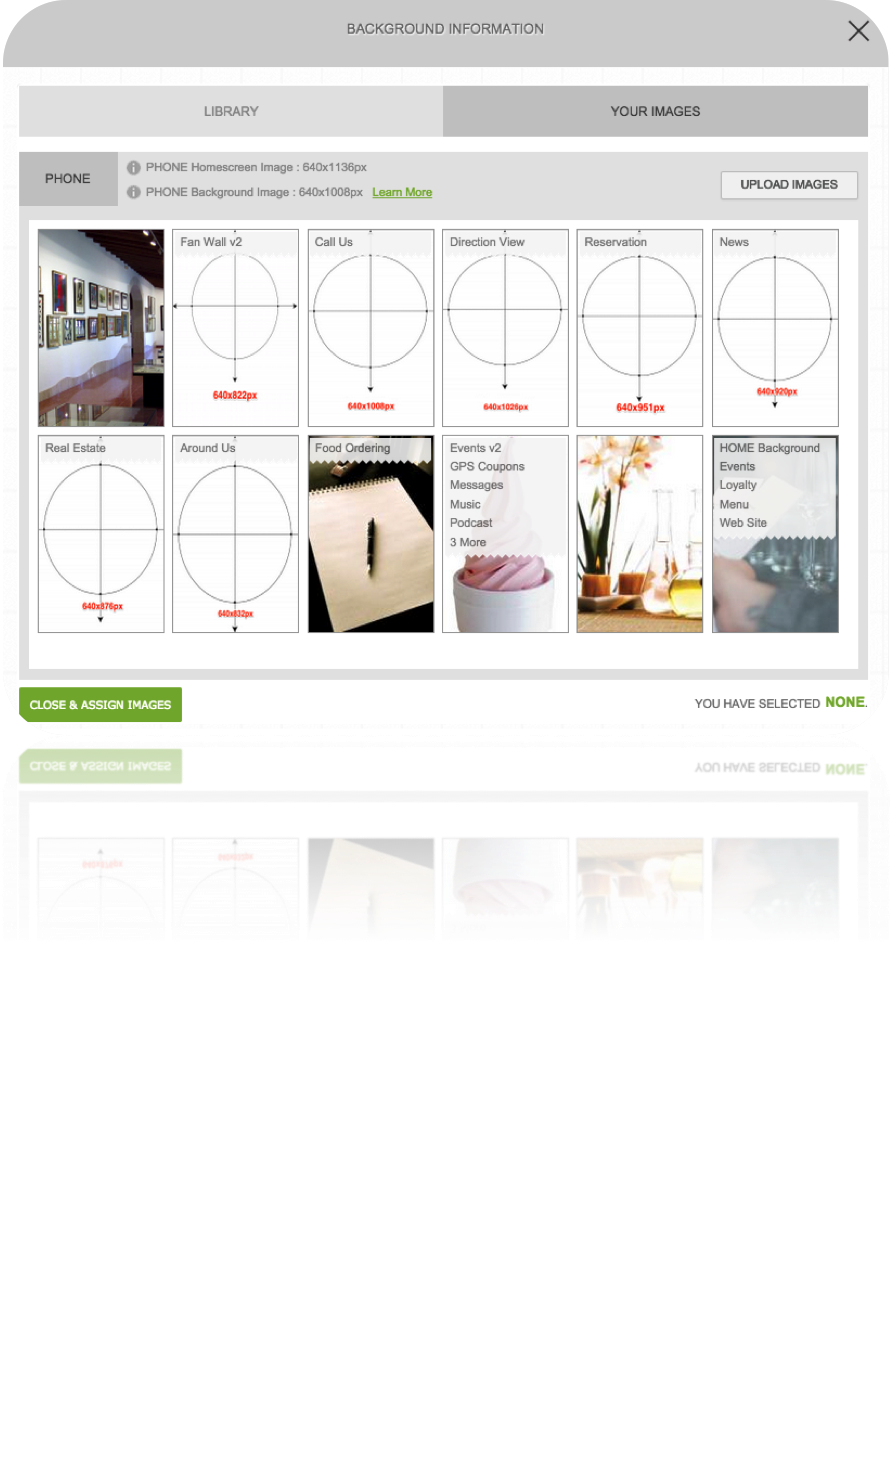
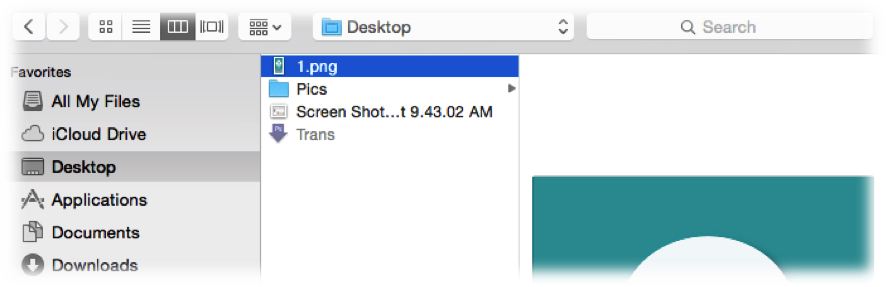
6. Click Upload Images. A pop-up window will appear. Select the image file(s) you want to upload from your computer, then click Open (or whatever command applies to your operating system).
7. Once uploaded, the images will appear in the Your Images section. You can click Close & Assign Images to return to Background Images.

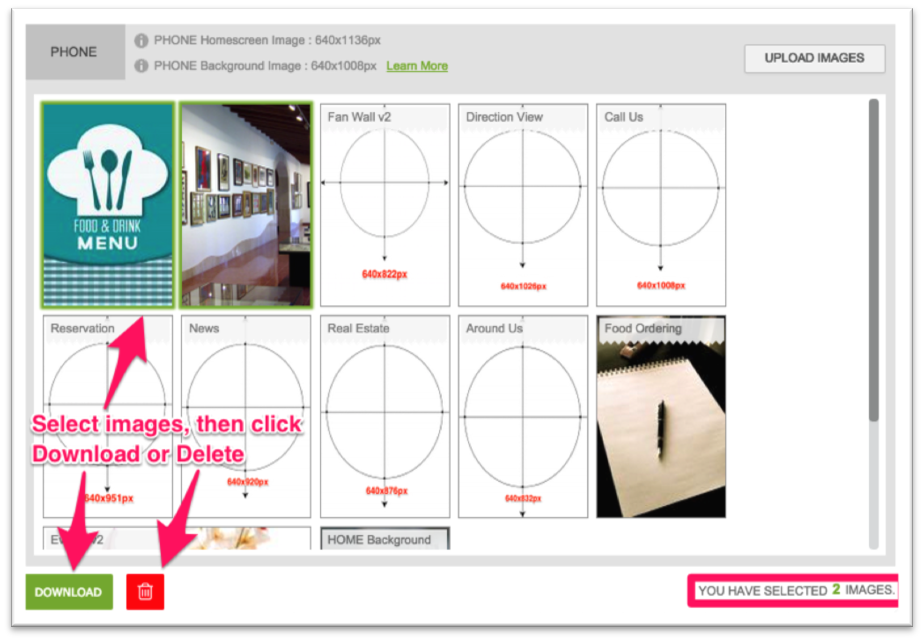
8. If you wish to download or delete images from the Your Images section, just select the image(s), then click the appropriate button at the bottom left.
Assigning Background Images
1. Back in the main Background Images view, you’ll see your newly selected/uploaded images for that particular size section. To begin assigning, just hover over an image and click the checkmark. Your image will be highlighted as seen below.
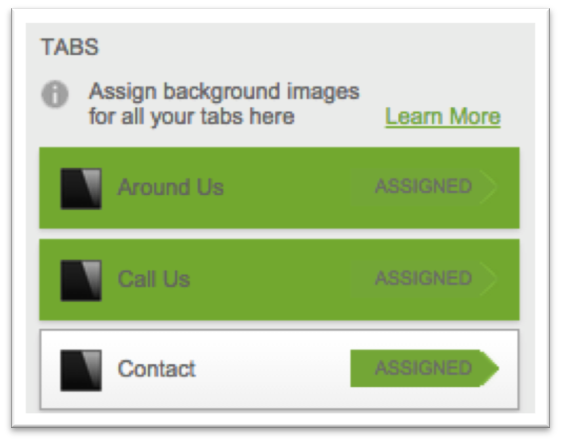
2. Next, select the area(s) you’d like to assign this background image to from the left-side menu. Click Background under the Home Screen section to make it your home screen background image, and/or click the tabs you’d like to assign it to under the Tabs section. (Note: You’ll assign slider images the same way. See the Slider Images instructions below for more info.)
3. Finally, click Save at the top right to apply your changes. The page will refresh, and you’ll see the newly assigned areas listed on top of the background image.
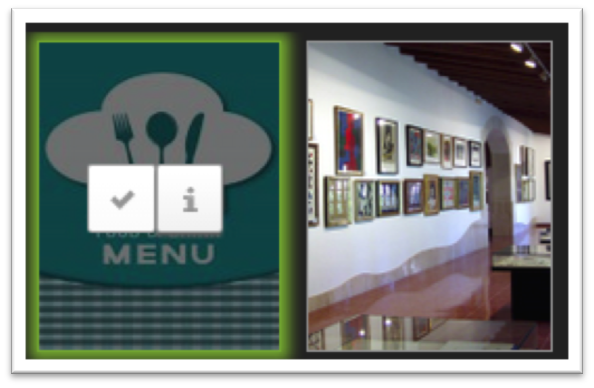
4. You can also hover over an image and click the info icon to view more details. Don’t forget about the Locations section (below Tabs in the left-side menu) where you can assign background images to specific Locations of your Contact tab.

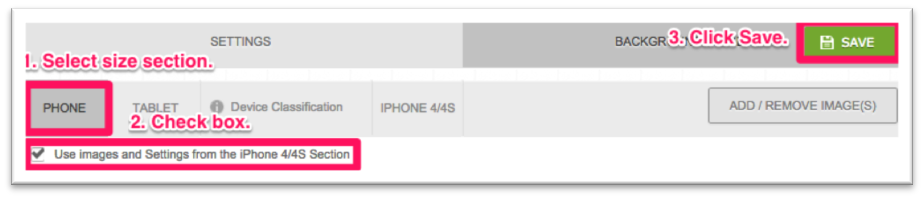
5. You can now move onto the other two size sections to upload and assign properly sized images for both. If you wish to use your iPhone 4/4S images for Phone and/or Tablet instead, just visit that size section, check the box to “Use images and Settings from the iPhone 4/4S Section,” then click Save. Your images and assignments will automatically apply to that device size. (Note: This will result in stretched images, so if quality is your top priority, we recommend selecting/uploading background images for each size section.)
6. Once you’ve finished assigning your background images, you can view your changes in the app after refreshing. Appearance Step changes always take effect immediately, as long as your app’s source code supports the changes.
Slider Images
Slider images appear atop your home screen background image. You can select various effects that dictate how they appear to the end user. Though slider images are technically full-screen images, you can get creative with shapes by using transparency to overlay your home screen partially rather than fully.
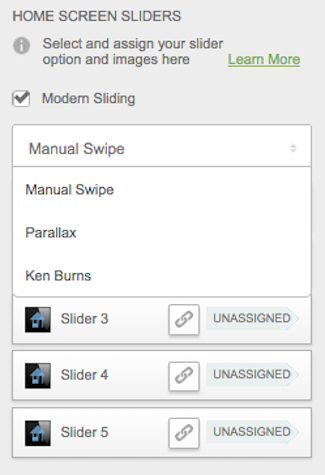
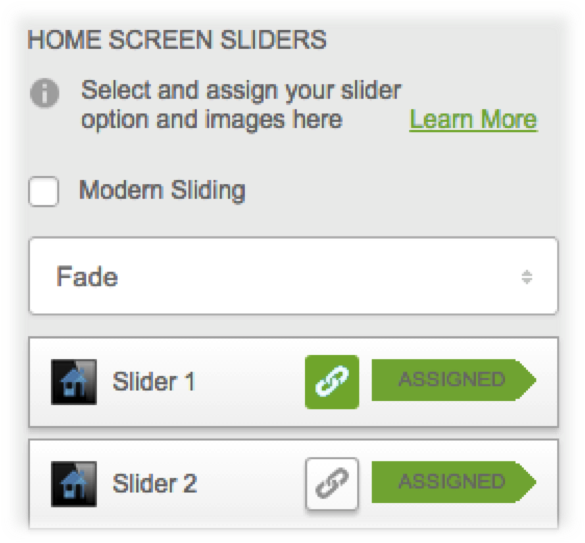
There are two main options for sliders: Traditional & Modern. To activate and view the Modern options, check the “Modern Sliding” box in the left-side menu as shown in the right image below. (Note: Modern slider effects only work on apps published since April 2014. If you wish to use these effects but your app is operating on an older source code, you must republish it.) To upload and assign slider images, follow the same steps above.
Traditional Slider Effects
• Manual Swipe: User must manually swipe through slider images.
• Sliding: Slider images will transition by sliding across the screen.
• Fade: Slider images will gradually fade into each other.
Modern Slider Effects
• Manual Swipe: User must manually swipe through slider images.
• Parallax: An improvement on Sliding, the images will slide across the screen quicker and more seamlessly.
• Ken Burns: An improvement on Fade, the images will be slowly zoomed in upon before fading out.
Traditional Slider Sizes
• iPhone 4/4S: 640x960px
• Phone: 640x1136px (750x1334px when optimizing for iPhone 6)
• Tablet: 1536 x 2048px
Modern Slider Sizes
• iPhone 4/4S: 1040x960px
• Phone: 1040x1136px
• Tablet: 1936x2048px
Note: Sizing for Parallax and Ken Burns is largely trial & error. For Ken Burns, we suggest starting with larger dimensions than dictated above to ensure the zoom effect works well on each device size. For Parallax, if you plan to include text or important graphics in the images, be sure that content is restricted to the center 640px (in width) of the image—otherwise, that content will be cut off by the effect.
Linked Sliders
You can link a slider image to a specific tab within the app. This makes the image clickable, leading the user to the selected tab or in-tab item. This is a great way to highlight a key feature within the app.
1. Click the link icon next to the slider in the left-side menu.
2. The Link Editor window will pop up. Select the tab you want to link to from the drop-down menu. Some tabs (like Around Us, Events, Info, etc.) have items, so you can check the box next to the item you wish to link to, or leave the boxes unchecked to link to the main tab.
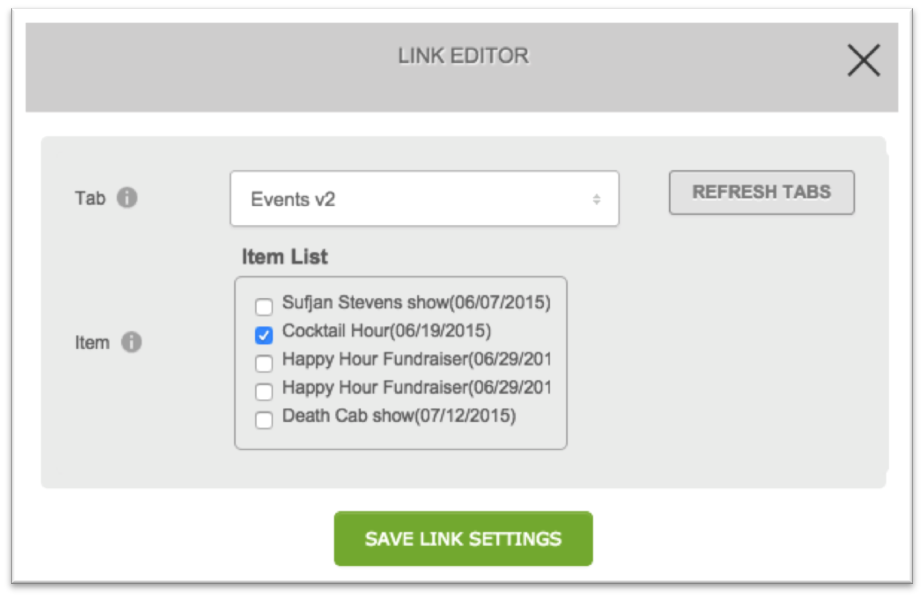
3. Once you’ve made your selection, click Save Link Settings. A confirmation message will appear at the top, and you can then close the window.
4. Once linked, the slider’s link icon will be highlighted. To disable the link, just click the link icon once more, select No Link from the drop-down menu, then click Save Link Settings.

Unassigning Background & Slider Images
You can remove image assignments at any point and your change will take effect immediately. Without clicking, drag your cursor from left to right or right to left over the area you want to unassign. When the trash icon appears, click it to unassign the image. The page will refresh and the slider or tab will be marked “unassigned” once more. You don’t need to click the Save button for this change to take effect.
iSchoolApps allows you to change your School App, when required. Your Parents will see the difference once they open their mobile app again, a seamless change to their iSchoolApp.
iSchoolApps.com.au